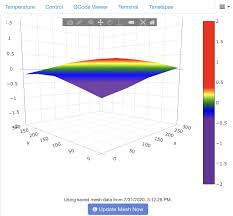
Separate tramming, mesh compensation and Z offset
A good first layer needs a mechanically sound printer, a bed aligned with its motion system, and a suitable nozzle-to-bed distance. A mesh describes surface variation so firmware can compensate during a print. It does not tighten a loose gantry or calibrate the probe’s Z offset for you.
In Marlin, Bilinear and Unified Bed Leveling (UBL) are firmware features selected when the firmware is built. A G29 parameter does not switch a printer from one algorithm to the other. Confirm your firmware configuration before using examples from either workflow.
Bilinear: probe a grid and use its mesh
Bilinear leveling measures a rectangular grid and interpolates between its points. It is a practical workflow when you want to probe a fresh mesh without managing UBL storage slots.
G29 T does not mean “choose Bilinear.” The meaning of G29 and its options depends on the leveling feature compiled into Marlin. Use the Bilinear G29 reference for your build.
Example probing sequence
Use this only after motion directions, homing, probe deployment, and probe offsets have been verified. Clear the bed and bring it to the material’s intended operating conditions using your printer’s normal controls.
G28       ; Home the configured axes
G29       ; Probe using the compiled-in Bilinear workflow
M420      ; Report leveling state
Check the probing result before printing. If you intend to save settings, confirm EEPROM support and understand that M500 saves other current settings too. Do not assume a mesh persists across a restart merely because probing completed.
Strengths and limits
Bilinear keeps routine probing straightforward. Probe density and reachable area depend on configuration; an unreachable edge or an unreliable probe can still produce a poor result. More points cost time and do not correct loose hardware.
UBL: build, inspect and store a reusable mesh
UBL adds mesh editing and storage workflows. Its phases let you probe accessible points and address missing regions before saving a mesh. This is useful when you need control over a persistent mesh, provided you are willing to inspect it.
Example UBL setup
On a configured UBL printer with a working probe and EEPROM mesh storage:
G28       ; Home first
G29 P1    ; Probe the reachable mesh points
Inspect the mesh before continuing. G29 P3 can fill unmeasured points; it is not a substitute for a measurement, and its result needs checking. Once all required points are valid:
G29 S0    ; Save the mesh to slot 0, replacing that slot
G29 A     ; Activate UBL
M420      ; Report the current state
For a later print, load the intended saved mesh with G29 L0, then activate and verify it after homing. S0 saves; L0 loads. Check the UBL G29 reference for the exact behavior and prerequisites in your firmware.
Strengths and limits
UBL offers more control over mesh preparation and reuse. It also makes it possible to load the wrong slot or reuse a mesh after changing the build surface. Label saved profiles and regenerate the mesh when the mechanical or thermal conditions have changed materially.
Bilinear vs UBL
| Question | Bilinear | UBL |
|---|---|---|
| Typical workflow | Probe a grid | Prepare and manage a mesh |
| Mesh storage | Follow firmware settings and EEPROM behavior | Explicit UBL storage slots |
| Missing probe regions | Resolve probe reach and configuration | Inspect and fill or edit as appropriate |
| Main operational risk | Assuming a fresh mesh is saved or active | Reusing an unsuitable mesh or wrong slot |
Bed size alone is not a rule for choosing between them. Probe reliability, build-surface changes, and your start G-code matter more than an arbitrary size threshold.
Check what happens after G28
Marlin normally disables leveling during homing unless configured to enable or restore it afterward. Check the state in your actual start sequence. With a valid mesh loaded, M420 S1 enables compensation; M420 reports its state. See the M420 reference.
Fade height gradually reduces compensation with height. It is not exclusive to UBL: supported mesh builds can use M420 Z... when fade support is enabled. Choose the value for the printer rather than copying a universal setting.
@BEDLEVELVISUALIZER, seen in some OctoPrint examples, is a host-plugin marker, not a Marlin motion command. Only include it when that host integration expects it.
Validate with a first-layer print
After probing, verify the active mesh, set Z offset through the printer’s calibration procedure, and print a small first-layer pattern across the bed. Inspect adhesion and line consistency before increasing speed. Keep a record of the mesh, bed conditions, and start G-code so later changes are comparable.
For the wider build and calibration sequence, see the DIY 3D printer guide. Command references were reviewed on October 16, 2026; no G-code in this article was executed on your printer.